
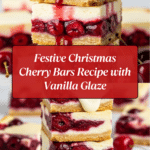
Christmas Cherry Bars Recipe
Introduction
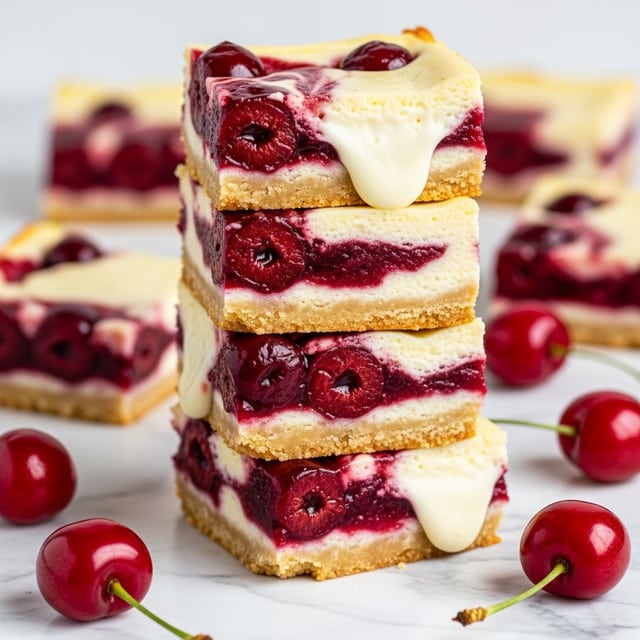
These Christmas Cherry Bars are a delightful holiday treat featuring a buttery base layered with sweet cherry pie filling and topped with a light vanilla glaze. Perfect for festive gatherings, they combine rich flavors and a tender crumb to satisfy your seasonal sweet tooth.

Ingredients
- 1 cup of butter, softened
- 2 cups of sugar
- 4 eggs
- 1 tsp vanilla extract
- 3 cups all-purpose flour
- 1 tsp salt
- 1 can (21 ounces) cherry pie filling
- For the glaze (optional):
- 1 cup powdered sugar
- 2 tbsp milk
- ½ tsp vanilla extract
Instructions
- Step 1: Preheat your oven to 350°F (175°C) and grease a 9×13 inch baking pan.
- Step 2: In a large bowl, cream together the softened butter and sugar until the mixture is light and fluffy.
- Step 3: Beat in the eggs one at a time, then stir in the vanilla extract.
- Step 4: In a separate bowl, whisk together the all-purpose flour and salt.
- Step 5: Gradually add the dry ingredients to the creamed mixture, mixing well to combine.
- Step 6: Spread 3 cups of the batter evenly into the prepared pan to form the base layer.
- Step 7: Carefully spread the cherry pie filling over the batter layer.
- Step 8: Drop the remaining batter in small clumps over the cherry filling to create the top layer.
- Step 9: Bake in the preheated oven for 35 to 40 minutes, or until the top is golden brown and a toothpick inserted near the center comes out clean.
- Step 10: Allow the bars to cool completely on a wire rack before glazing.
- Step 11: For the optional vanilla glaze, whisk together powdered sugar, milk, and vanilla extract in a small bowl until smooth.
- Step 12: Once the bars are cooled, drizzle the glaze evenly over the top and let it set before cutting into bars and serving.
Tips & Variations
- For a different fruity twist, replace the cherry pie filling with blueberry or raspberry filling.
- Using softened butter is key to achieving a smooth, creamy batter that blends well with the sugar.
- If you prefer a thicker glaze, reduce the milk to 1 tablespoon or add more powdered sugar until desired consistency is reached.
- Chilling the bars for an hour after glazing helps the topping set firmly for cleaner slices.
Storage
Store the Christmas Cherry Bars in an airtight container at room temperature for up to 3 days. For longer storage, refrigerate them for up to a week. If refrigerated, allow the bars to come to room temperature or warm slightly before serving. The glaze may firm up in the fridge but will soften as the bars warm.
How to Serve
Serve this delicious recipe with your favorite sides.
FAQs
Can I use fresh cherries instead of canned cherry pie filling?
Fresh cherries can be used, but they should be cooked down with sugar and a thickener like cornstarch to mimic the consistency and sweetness of pie filling. This ensures the bars maintain their structure and flavor.
Is it necessary to use the vanilla glaze?
The vanilla glaze is optional but adds a sweet, creamy finish that complements the tart cherry filling. The bars are still delicious without it, especially if you prefer a less sweet dessert.
Print
Christmas Cherry Bars Recipe
- Total Time: 55 mins
- Yield: 24 bars 1x
Description
These festive Christmas Cherry Bars combine a buttery, tender base with a sweet and tangy cherry pie filling, all topped with an optional smooth vanilla glaze. Perfect for holiday gatherings, these bars offer a delightful blend of flavors and textures that celebrate the season in every bite.
Ingredients
Base Batter
- 1 cup butter, softened
- 2 cups sugar
- 4 eggs
- 1 tsp vanilla extract
- 3 cups all-purpose flour
- 1 tsp salt
Filling
- 1 can (21 ounces) cherry pie filling
Vanilla Glaze (Optional)
- 1 cup powdered sugar
- 2 tbsp milk
- ½ tsp vanilla extract
Instructions
- Preheat Oven: Preheat your oven to 350°F (175°C) and grease a 9×13 inch baking pan thoroughly to prevent sticking.
- Cream Butter and Sugar: In a large mixing bowl, beat the softened butter and sugar together until the mixture is light in color and fluffy in texture, which helps create a tender base.
- Add Eggs and Vanilla: Incorporate the eggs one at a time, beating well after each addition to combine fully, then stir in the vanilla extract for flavor.
- Combine Dry Ingredients: In a separate bowl, whisk together the all-purpose flour and salt to ensure even distribution of salt throughout the batter.
- Mix Dry and Wet Ingredients: Gradually add the flour mixture to the creamed butter mixture, mixing well but avoiding overmixing to maintain a tender crumb.
- Prepare the Base: Spread about three cups of the batter evenly into the bottom of the greased baking pan to form the base layer.
- Add Cherry Filling: Carefully spread the entire can of cherry pie filling evenly over the batter base, distributing the cherries and syrup uniformly.
- Top Layer: Drop the remaining batter in small dollops over the cherry filling, spreading gently if desired to cover the filling partially but leaving some cherry visible.
- Bake: Place the pan in the preheated oven and bake for 35 to 40 minutes, or until the bars turn golden brown and a toothpick inserted in the batter comes out clean.
- Cool: Remove the pan from the oven and allow the bars to cool completely on a wire rack to set properly before glazing.
- Vanilla Glaze (Optional) Mix Ingredients: In a small bowl, whisk together powdered sugar, milk, and vanilla extract until the glaze is smooth and lump-free.
- Drizzle: Once the bars have cooled fully, drizzle the vanilla glaze over the top evenly, allowing it to set before cutting.
- Serve: Cut into individual bars and serve as a festive holiday treat to enjoy with family and friends.
Notes
- You can substitute cherry pie filling with fresh or frozen cherries mixed with sugar and cornstarch if preferred for a homemade touch.
- Ensure the butter is softened but not melted to achieve the perfect creamed texture.
- The vanilla glaze is optional but adds a sweet finishing touch that complements the tart cherries nicely.
- Bars can be stored in an airtight container at room temperature for up to 3 days or refrigerated for up to a week.
- For a gluten-free version, substitute the all-purpose flour with a gluten-free baking blend.
- Prep Time: 15 mins
- Cook Time: 40 mins
- Category: Dessert
- Method: Baking
- Cuisine: American
Keywords: Christmas cherry bars, holiday dessert bars, cherry pie bars, festive dessert, cherry bars recipe, baked cherry dessert
