
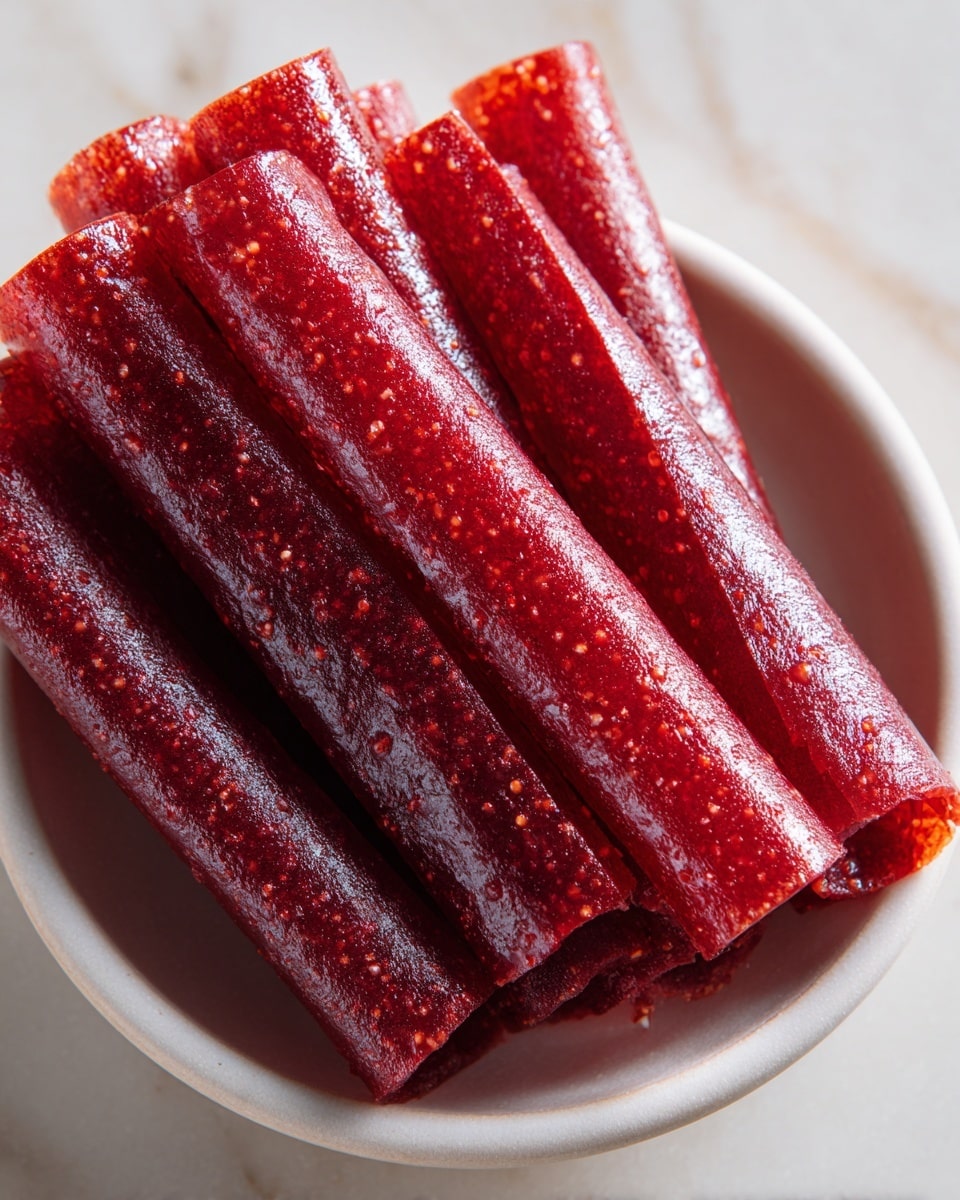
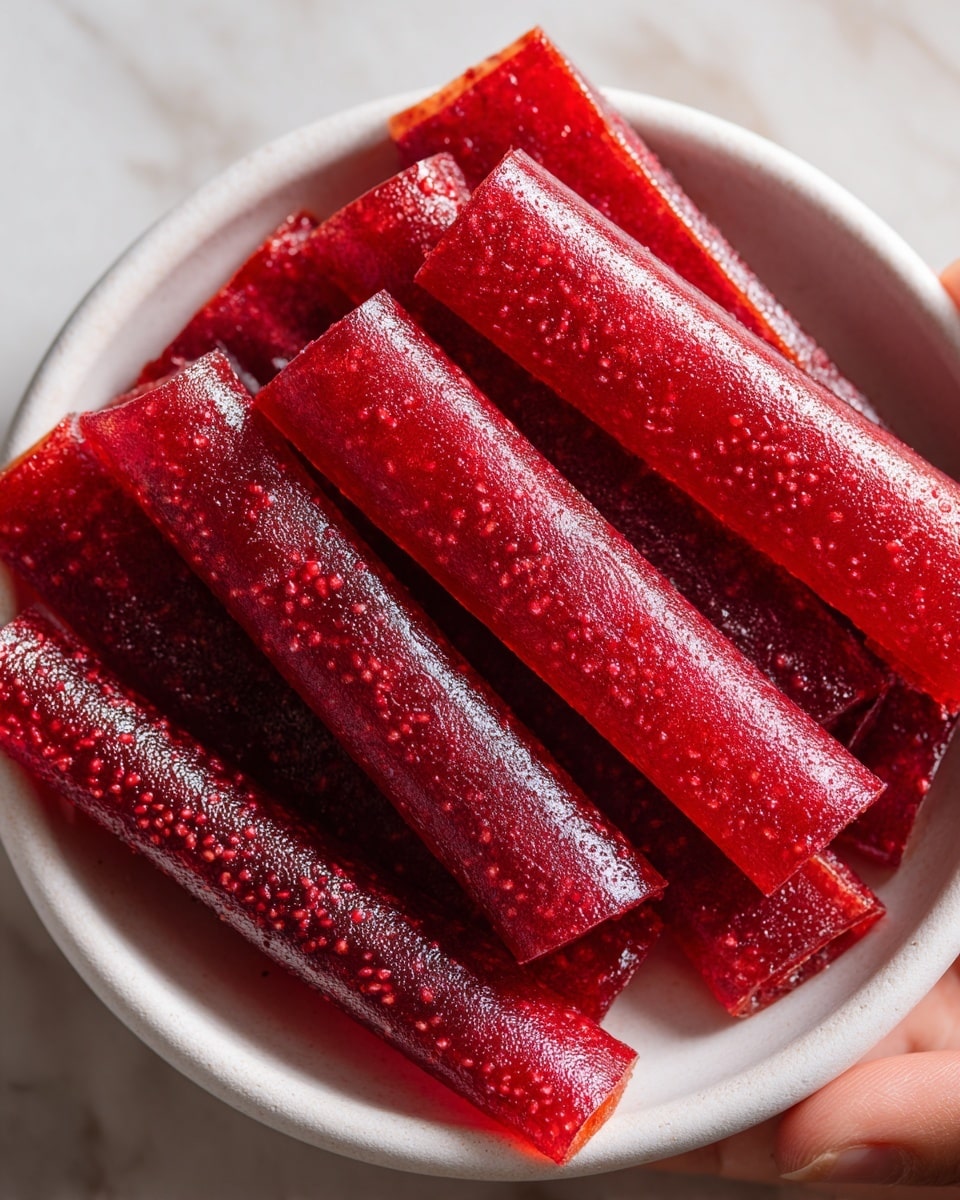
3-Ingredient Homemade Fruit Roll-Ups Recipe
Introduction
Homemade fruit roll-ups are a fun, healthy snack that only requires three simple ingredients. This recipe lets you customize flavors using your favorite fruits for a naturally sweet treat kids and adults will love.
Ingredients
- 4–6 cups fresh or frozen fruit (600–700 g) – berries, mango, peaches, or any blend you love
- 4–6 Tbsp honey (or swap with sugar or a sugar substitute)
- 4 Tbsp lemon juice (60 mL)
Instructions
- Step 1: Prep the fruit – Wash, peel, and chop your fruit if needed. Blend it until smooth.
- Step 2: Sweeten and balance – Add honey and lemon juice to the purée. Blend again to combine.
- Step 3: Cook it down – Pour into a saucepan and simmer over low heat for 15–20 minutes, stirring often, until slightly thickened.
- Step 4: Spread and bake – Line 2 baking sheets with parchment or silicone mats. Spread the mixture evenly on each (about 1/8-inch thick).
- Step 5: Dry it out – Bake at 170°F (75°C) for 4–6 hours or until no longer sticky.
- Step 6: Cool and roll – Let cool completely. Cut into strips and roll with the parchment. Time to snack smart!
Tips & Variations
- Try mixing different fruits for unique flavor combinations, like strawberry and mango or peach and blueberry.
- If you prefer less sweetness, reduce the honey or substitute with agave syrup or maple syrup.
- Use silicone mats instead of parchment for easier peeling once dried.
- To speed up drying, rotate baking sheets halfway through the baking time.
Storage
Store fruit roll-ups in an airtight container or zip-top bag at room temperature for up to 2 weeks. For longer storage, keep them in the refrigerator to maintain freshness. Before eating, you can let them warm slightly to soften if they feel too firm.
How to Serve
Serve this delicious recipe with your favorite sides.
FAQs
Can I use frozen fruit for this recipe?
Yes, frozen fruit works well. Just thaw and drain any excess liquid before blending to avoid a runny mixture.
How can I tell when the fruit roll-ups are done drying?
The roll-ups should no longer feel sticky to the touch and peel easily from the parchment or mat. They should be flexible but not wet or tacky.
Print
3-Ingredient Homemade Fruit Roll-Ups Recipe
- Total Time: 4 hours 35 minutes
- Yield: Approximately 8–10 fruit roll-ups depending on size 1x
- Diet: Low Fat
Description
These 3-Ingredient Homemade Fruit Roll-Ups are an easy, healthy snack made from fresh or frozen fruit, sweetened naturally with honey and brightened with lemon juice. With no artificial additives, this recipe lets you customize your fruit roll-ups to your favorite flavors and enjoy a delicious, chewy treat perfect for kids and adults alike.
Ingredients
Fruit Base
- 4–6 cups fresh or frozen fruit (600–700 g) – berries, mango, peaches, or any blend you love
Sweetener and Flavoring
- 4–6 Tbsp honey (or swap with sugar or a sugar substitute)
- 4 Tbsp lemon juice (60 mL)
Instructions
- Prep the fruit: Wash, peel, and chop your chosen fresh or frozen fruit as needed. Place the fruit into a blender and blend until smooth to create a uniform purée.
- Sweeten and balance: Add honey and lemon juice to the fruit purée. Blend again until all ingredients are fully combined, adjusting sweetness to taste.
- Cook it down: Pour the fruit mixture into a saucepan and simmer over low heat for 15–20 minutes, stirring frequently. This thickens the purée slightly and concentrates the flavors.
- Spread and bake: Prepare two baking sheets by lining them with parchment paper or silicone baking mats. Spread the thickened fruit mixture evenly across the sheets to a thickness of about 1/8 inch.
- Dry it out: Place the baking sheets in an oven preheated to 170°F (75°C). Bake for 4–6 hours or until the fruit roll-ups are no longer sticky to the touch, allowing them to dry and set.
- Cool and roll: Remove the baking sheets from the oven and let the fruit roll-ups cool completely. Cut into strips and roll up with the parchment paper for easy snacking.
Notes
- You can substitute honey with sugar or any preferred sugar substitute to adjust sweetness and dietary needs.
- Different fruit combinations can yield unique flavors; experiment with berries, mango, peaches, or blends.
- Ensure the fruit mixture is spread evenly to dry uniformly during baking.
- Store finished fruit roll-ups in an airtight container at room temperature for up to two weeks or refrigerate for longer freshness.
- For faster drying, a food dehydrator set at the same temperature can be used instead of the oven.
- Prep Time: 15 minutes
- Cook Time: 4 hours 20 minutes
- Category: Snack
- Method: Baking
- Cuisine: American
Keywords: fruit roll-ups, homemade snacks, healthy fruit snacks, 3-ingredient recipe, fruit leather, kids snacks, natural sweetener


